Here are our Top 10 Turkey Tips for a Terrific Thanksgiving! Whether you’re already a seasoned pro or it’s your first time cooking the family Thanksgiving turkey, we’ve got some tips and tricks we think will help make your Thanksgiving cooking smooth and easy.
1. Prepping your MEATER for the turkey
Charge your MEATER and update the app the night before you cook your turkey! You should make sure you have the most up-to-date version of the app and check to see if any of your MEATER devices require any firmware updates. If you’re using the all-new MEATER 2 Plus, you don’t have to charge it as early in advance – the new fast charging feature is a game changer! Charging your MEATER 2 Plus for 30 minutes will give you a full charge and 24+ hours of cooking time.
2. Make sure you buy the right size turkey!
First, you will need to figure out how large of a turkey you need to serve. This depends on the number of people you are serving. For a whole turkey, prepare 1 lb of turkey per person. When purchasing a boneless turkey breast, you’ll typically need to buy ½ lb per person. Please note, it is important to pay attention to how big your oven is – make sure your turkey is not too big for your oven! It may be better for you to purchase two smaller turkeys instead of one.
3. Plan out the perfect turkey recipe for your hungry guests
The perfect recipe does exist! Thanksgiving Turkey recipes range from classic and easy to more advanced – so we’ve got something for everyone. Check out these recipes that we HIGHLY recommend:
4. Defrosting your turkey
Defrosting a frozen turkey can take time. Big birds can take up to a week! Check out these tips to help you decide on your preferred turkey defrost method for a successful holiday meal:
-
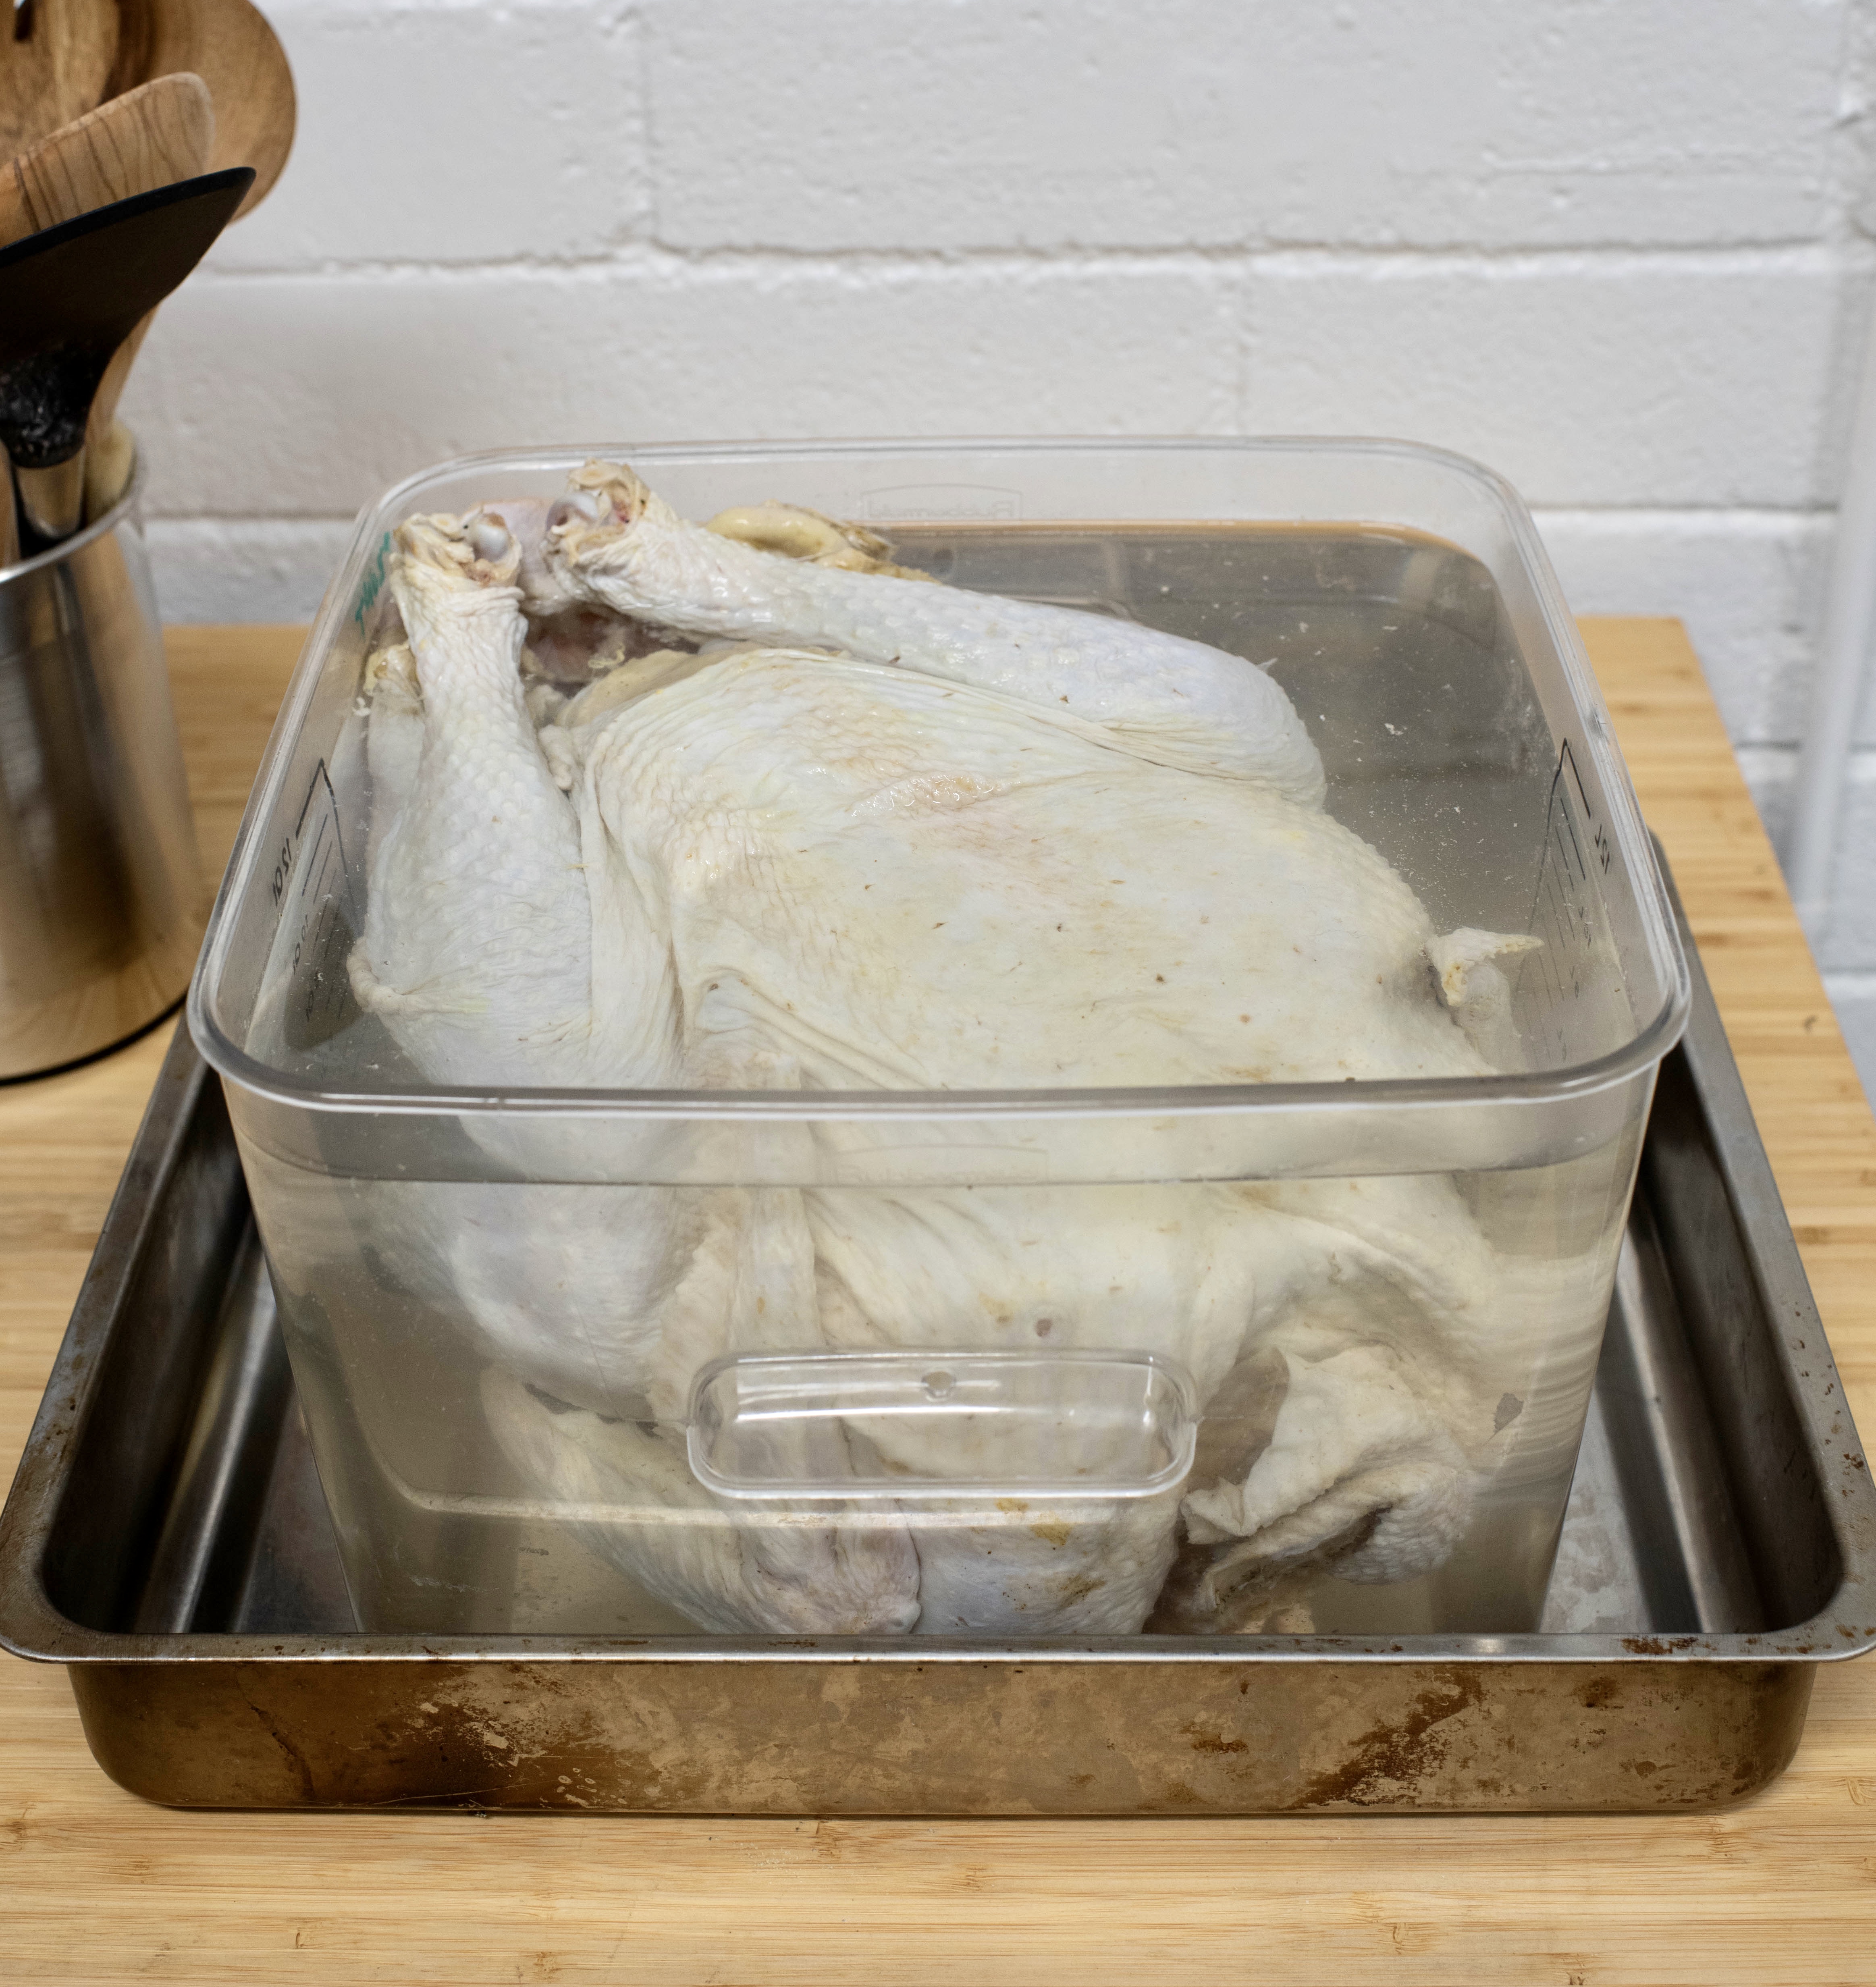
- A quick way to defrost it is to keep it completely submerged in a COLD water bath (i.e. a huge bucket, sink, or even your bathtub). Submerge the turkey UNOPENED and let it sit in the bath at a minimum of 30 minutes per pound. You might want to start the night before if you want to start cooking the next morning!
- The longer method requires use of your fridge. For every 4 lbs of turkey, you’ll want to account for 1 day of thawing in your fridge. For example, an 8 lb turkey will require 2 days of thawing, a 12 lb turkey will require 3 days, and a 16 lb turkey will require 4 days.
5. Nailing your MEATER probe placement
You’ll want to probe your turkey in the middle of the thickest part of the breast. Although the thigh is also a great place to measure turkey temperature, there is less meat in the thigh, which makes it harder to place the probe properly. If you have multiple probes, you can monitor the bird at both breasts and both thighs! Check out this helpful video for how to properly place your probe in poultry.
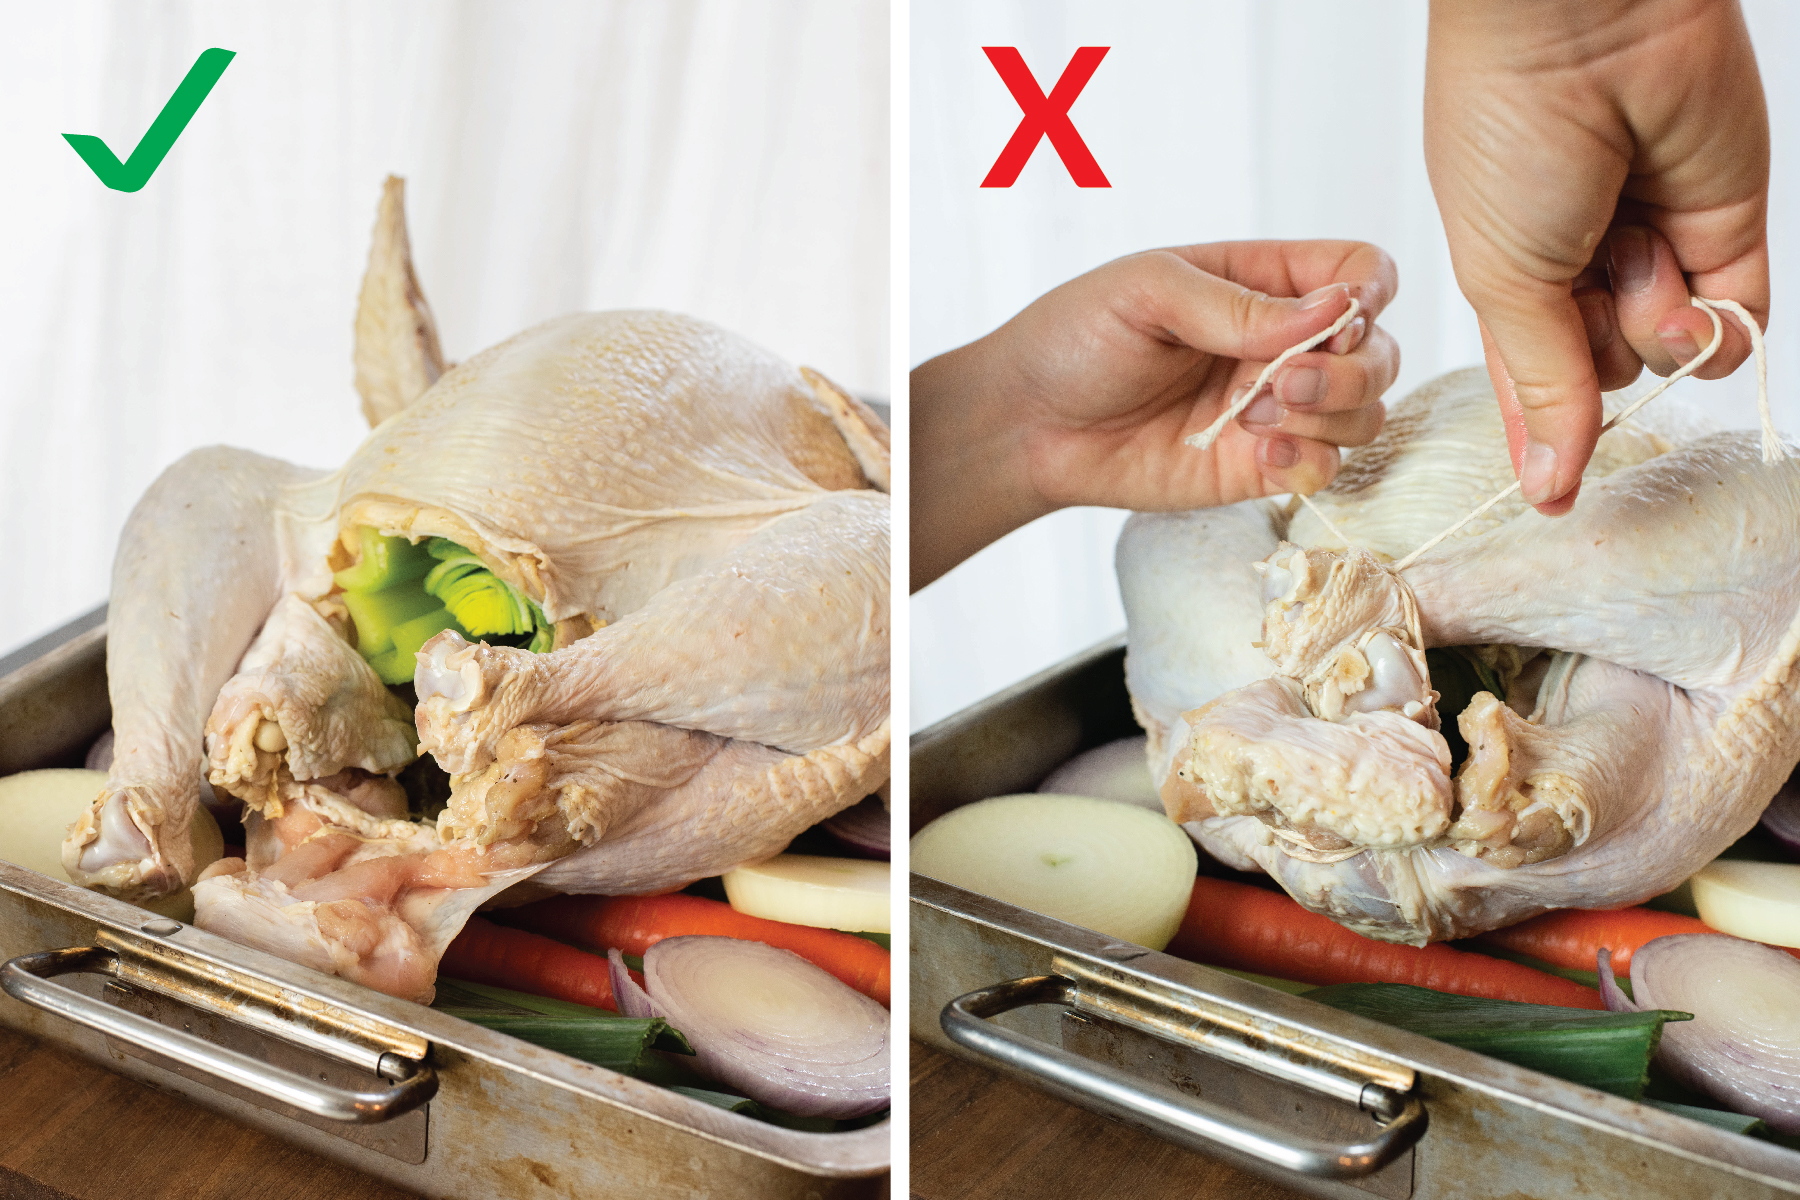
6. Don’t truss (tie) the legs!
Leave the legs untied to ensure the darker meats (legs and thighs) are exposed to the heating elements so they can properly cook to the right temperature. When cooking in an oven, have the legs/thighs placed towards the back of the oven where it is hotter!
7. Brine to add flavor and prevent drying out.
Brining the turkey overnight will prevent the turkey from drying out and keeps the turkey extra juicy during cooking, while the salt will also help season the bird. You’ll want to brine your defrosted turkey for at least 12 hours before you start cooking. Don’t forget to pat the turkey dry after the brine so the skin can crisp! If you don’t have the time or space for a brine, you can also inject the turkey with your favorite salty injection sauce right before cooking to help season and keep the bird from drying out.
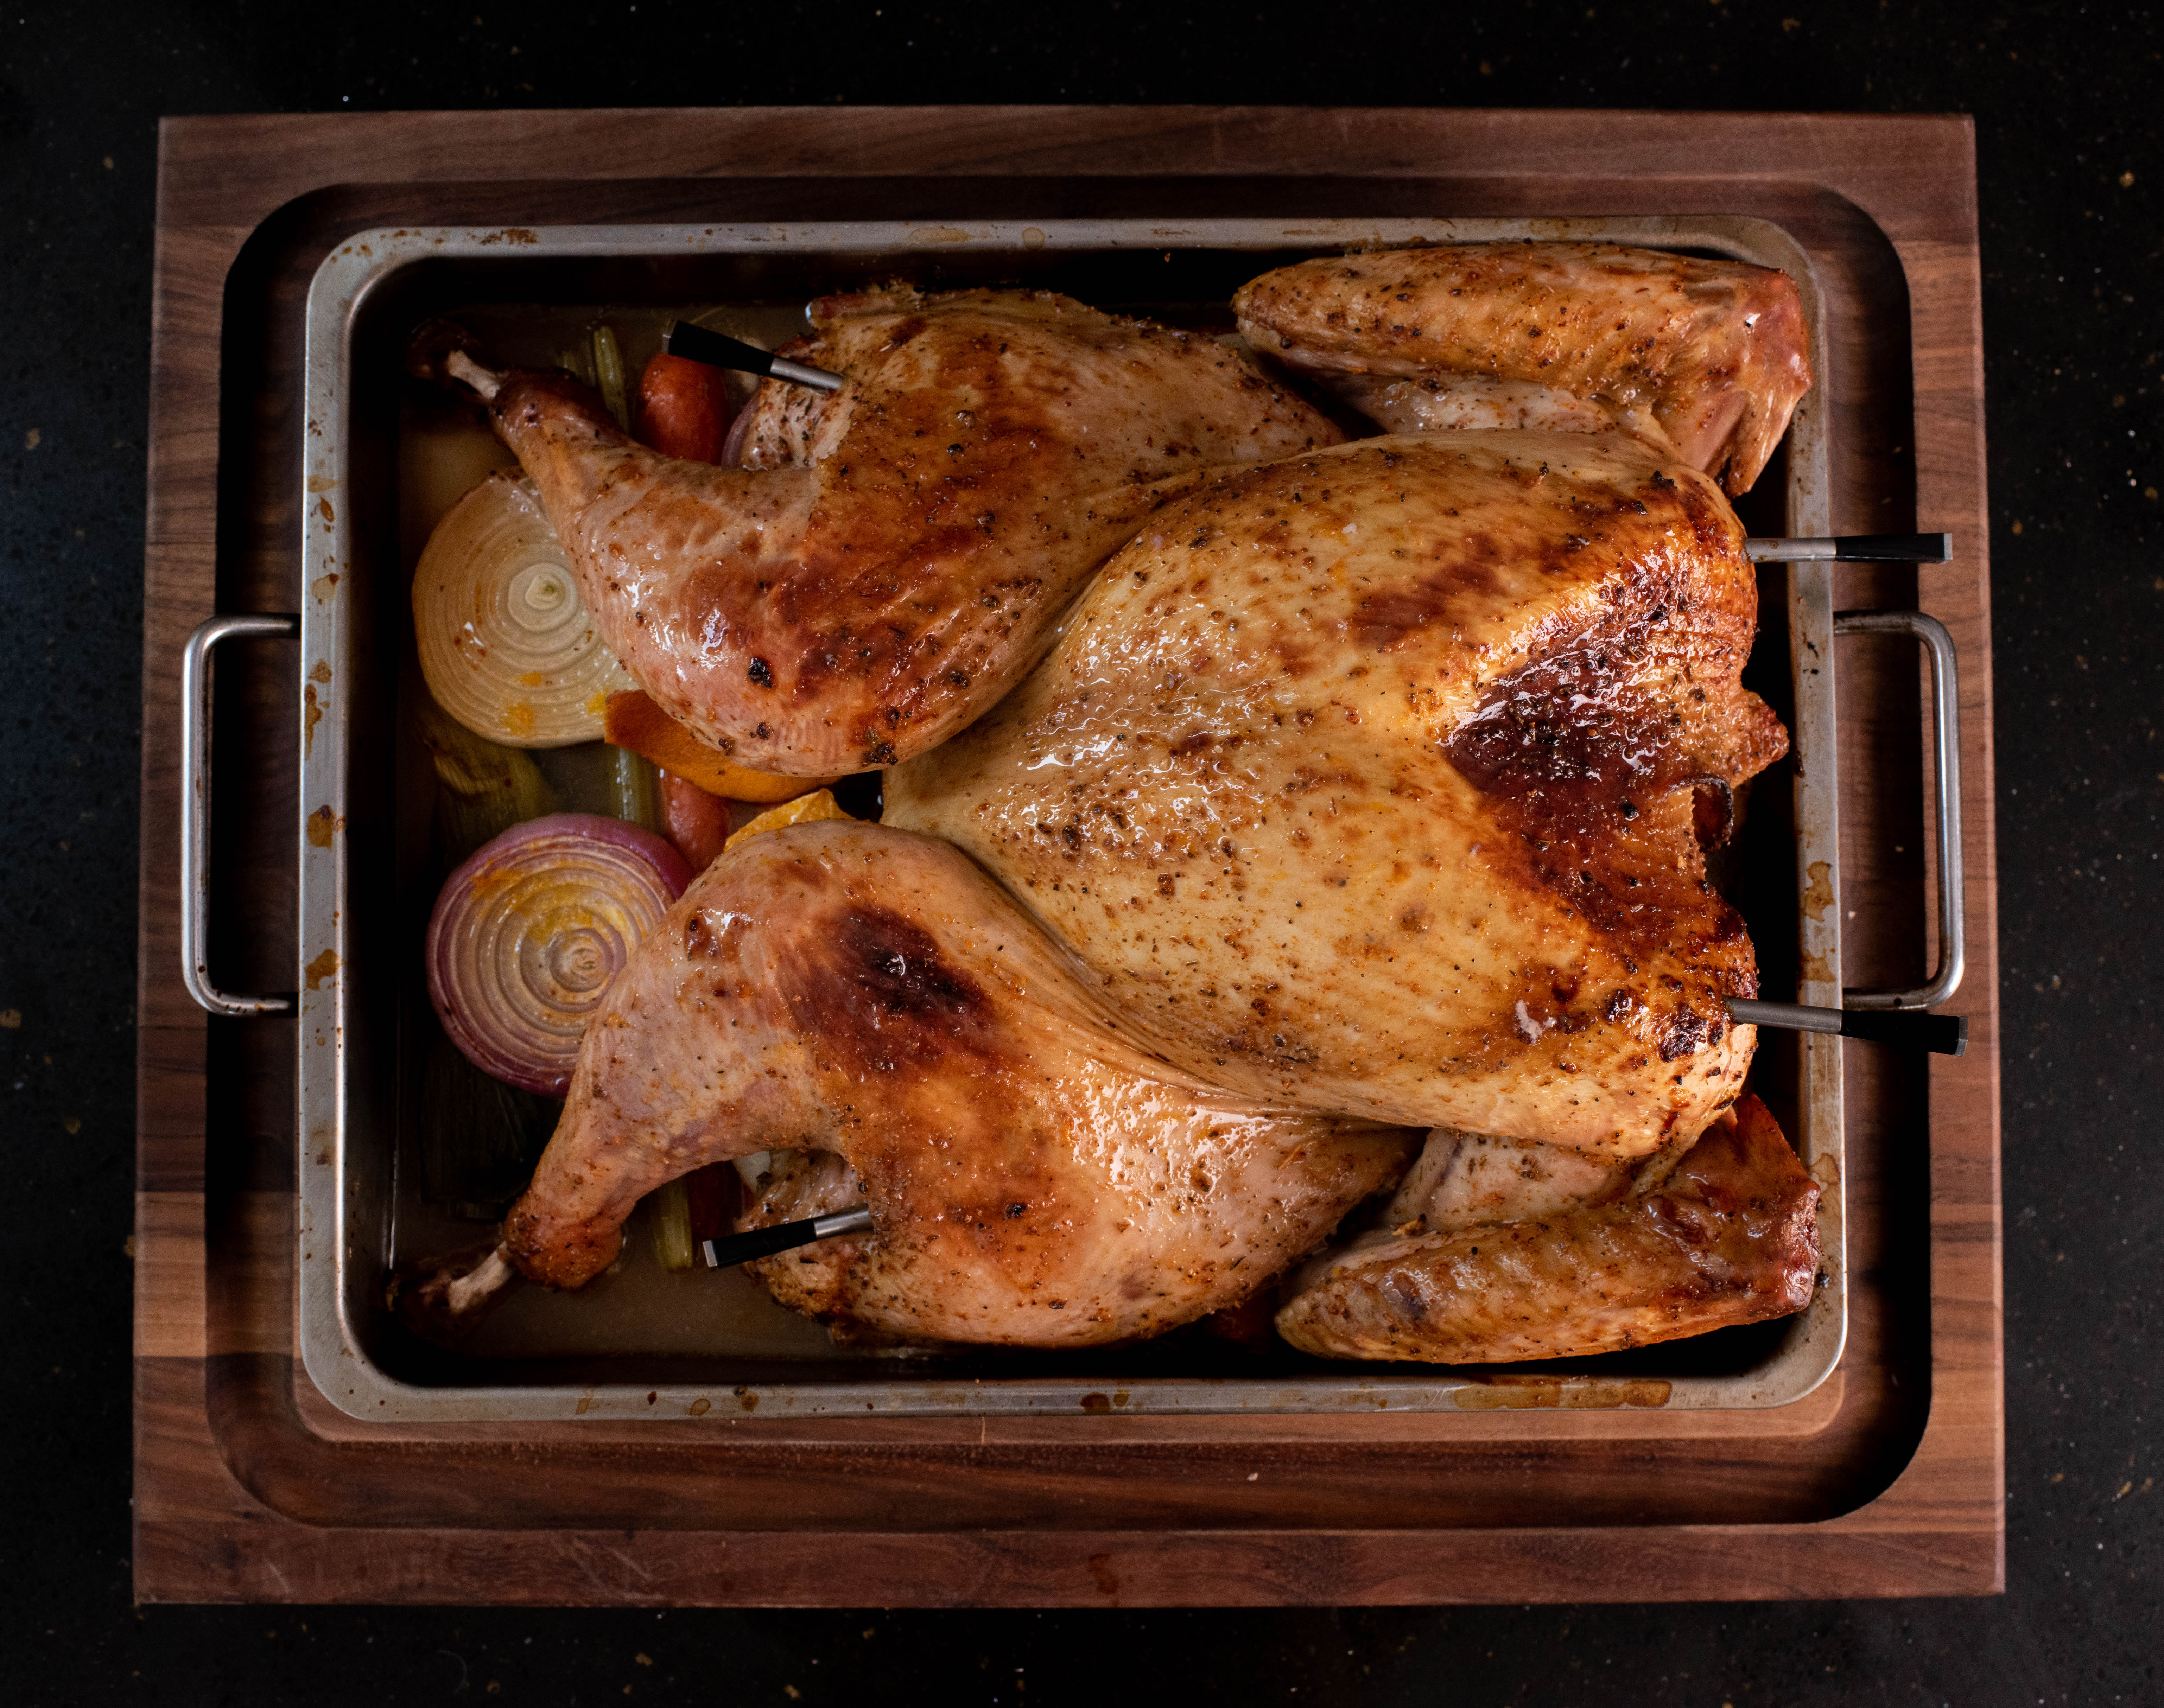
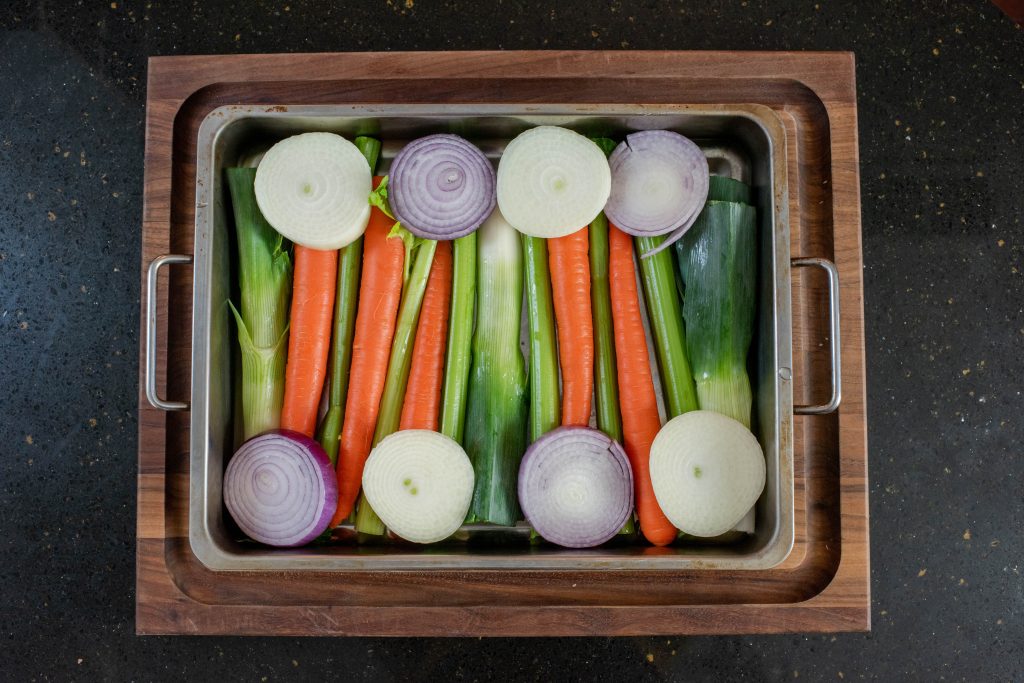
8. No roast rack? Use those veggies!
If your turkey is too large for a roast rack, no need to fret – use some veggies! When roasting in the oven, you can make your own roasting rack by layering the bottom of the roasting pan with fibrous vegetables, like carrots, onions, and celery. This will raise the turkey off the pan, allowing the heat to cook the bird all over. Plus, you can use the vegetables afterwards in gravy, stuffing, or as their own side!
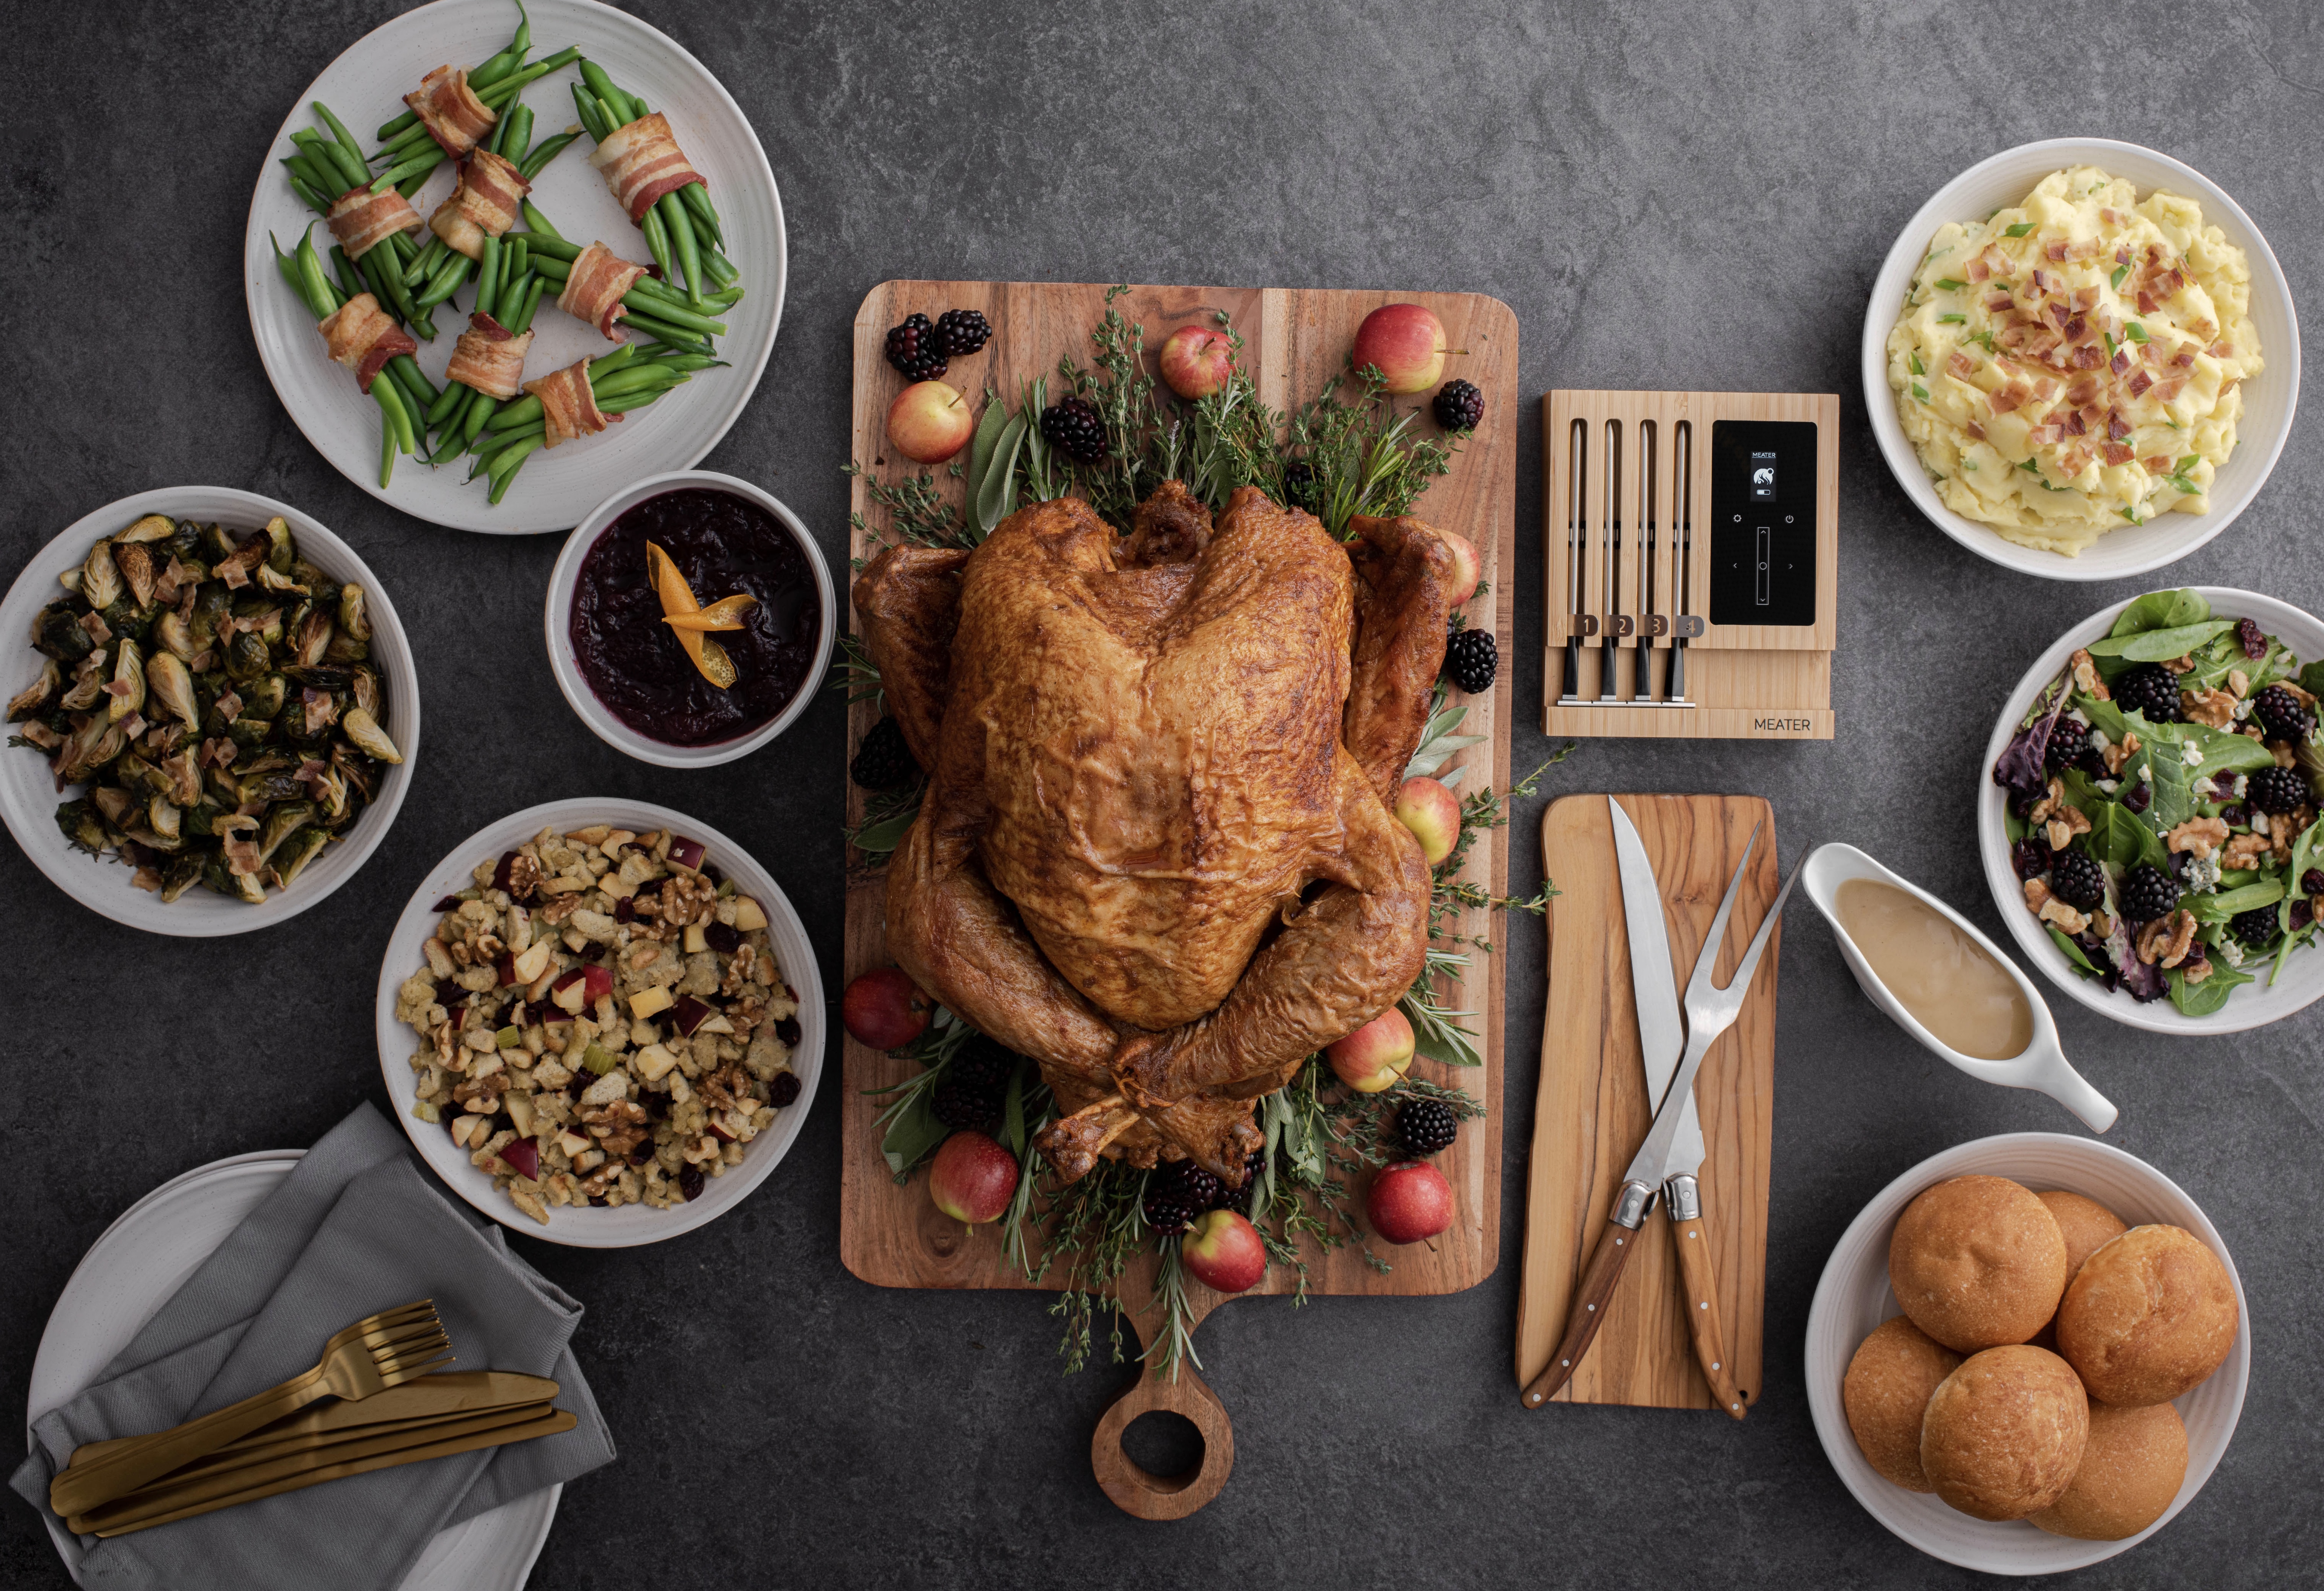
9. How to carve your beautifully cooked turkey?!
To carve a turkey successfully, begin by letting the rested turkey settle for 15 to 30 minutes. This ensures the juices are absorbed, making the meat juicy, and allows the turkey to cool for easier handling. Use a sharp chef’s knife, a large cutting board, and a platter for carving. For your cutting board, we recommend the MEATER Board – it even has a pouring spout for collecting all those yummy juices from the meat to use either for a dip, gravy ingredient, or for easy disposal! It’s an easy no-mess solution!
Start by removing the legs and thighs, then the wings. Cut along the breastbone to remove the breasts. For the white meat, slice the breasts into 1/2-inch-thick pieces. Separate the thigh from the drumstick and slice the boneless thigh. Serve the carved turkey immediately while it’s still warm! You did it!
10. How to clean your MEATER
If you’re using the Original MEATER or the MEATER Plus, check out this helpful video for how to clean your probe!
If you’re utilizing the brand new MEATER 2 Plus, you can easily wash your probe using your dishwasher! It’s 100% waterproof and dishwasher safe!
We’d love to see how your MEATERmade Thanksgivings turned out!
Share with us on social media by mentioning #meatermade in your post’s caption.
Have the most wonderful and delectable holiday!