Remember these tips for perfect, repeatable cooking results!

We created MEATER because the thought of blackened, overcooked roasts sends chills down our spines.
The MEATER app’s Guided Cook feature uses algorithms to calculate cooking estimates. However, to achieve peak accuracy with your MEATER, you need to be mindful of the following items:
Probe Placement
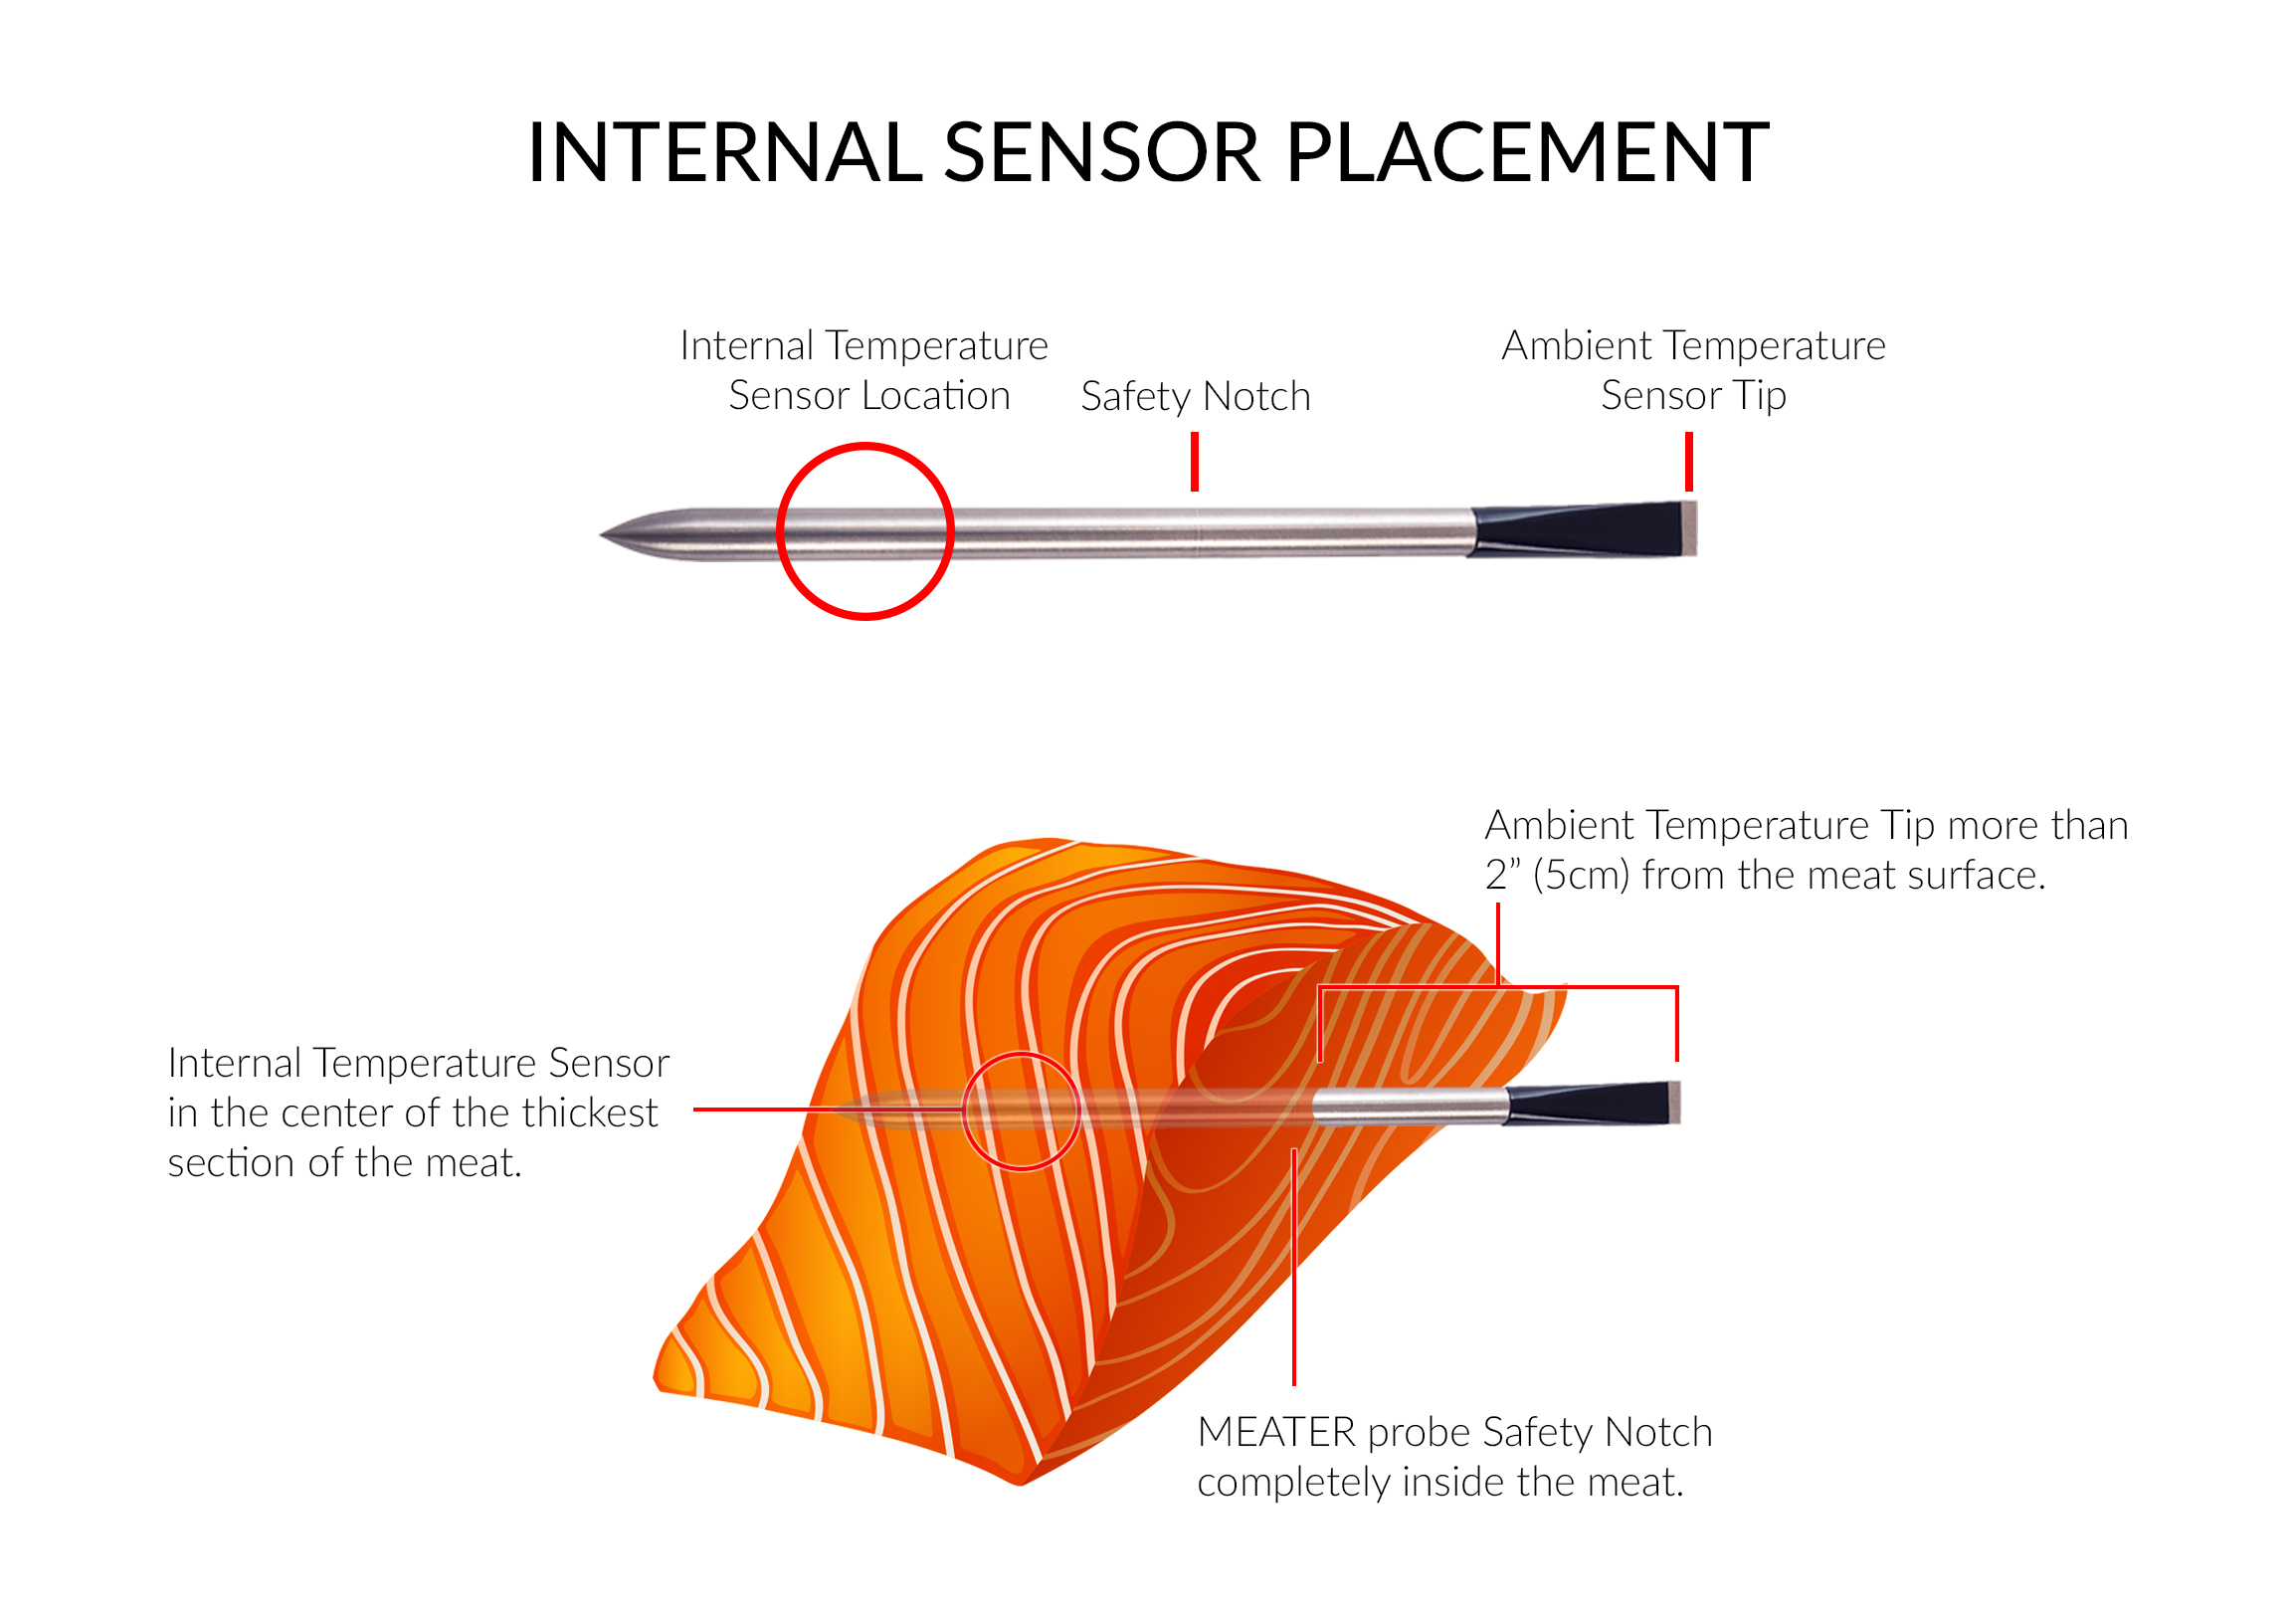
When cooking with MEATER, probe placement is absolutely essential to achieving a successful cook.
PROBLEM: If your probe isn’t inserted properly, then the sensors won’t be monitoring the correct part of your meat.

Solution: To ensure your probe is inserted correctly, make sure you’re positioning it in the center of the thickest part of the meat, away from any bones or excess fat. If you’re having trouble positioning your probe, check out our blog post that walks you through every step of the process!
Overcooking when Resting

Problem: Due to a process known as carryover cooking, your meat will continue to cook for several minutes after you’ve removed it from heat. In extreme cases, carryover cooking can cause your food to rise as much as 25° F.
Solution: The MEATER app takes carryover cooking into account when it calculates your estimated cook time. You’ll be alerted when your meat is approaching its target temperature, so that it can finish cooking while resting.
Additional Tips:
- Don’t rest your meat on the same tray you cooked on when you are alerted to “remove from heat.” Instead, transfer it to a room temperature surface to minimize carryover cooking.
- Carryover cooking is less predictable when cooking with high heat. For best results, we recommend always cooking your meat “low and slow.”
Searing

Problem: The high temperatures needed to sear your meat can potentially throw off your cooking estimates if you sear with the MEATER probe inserted.
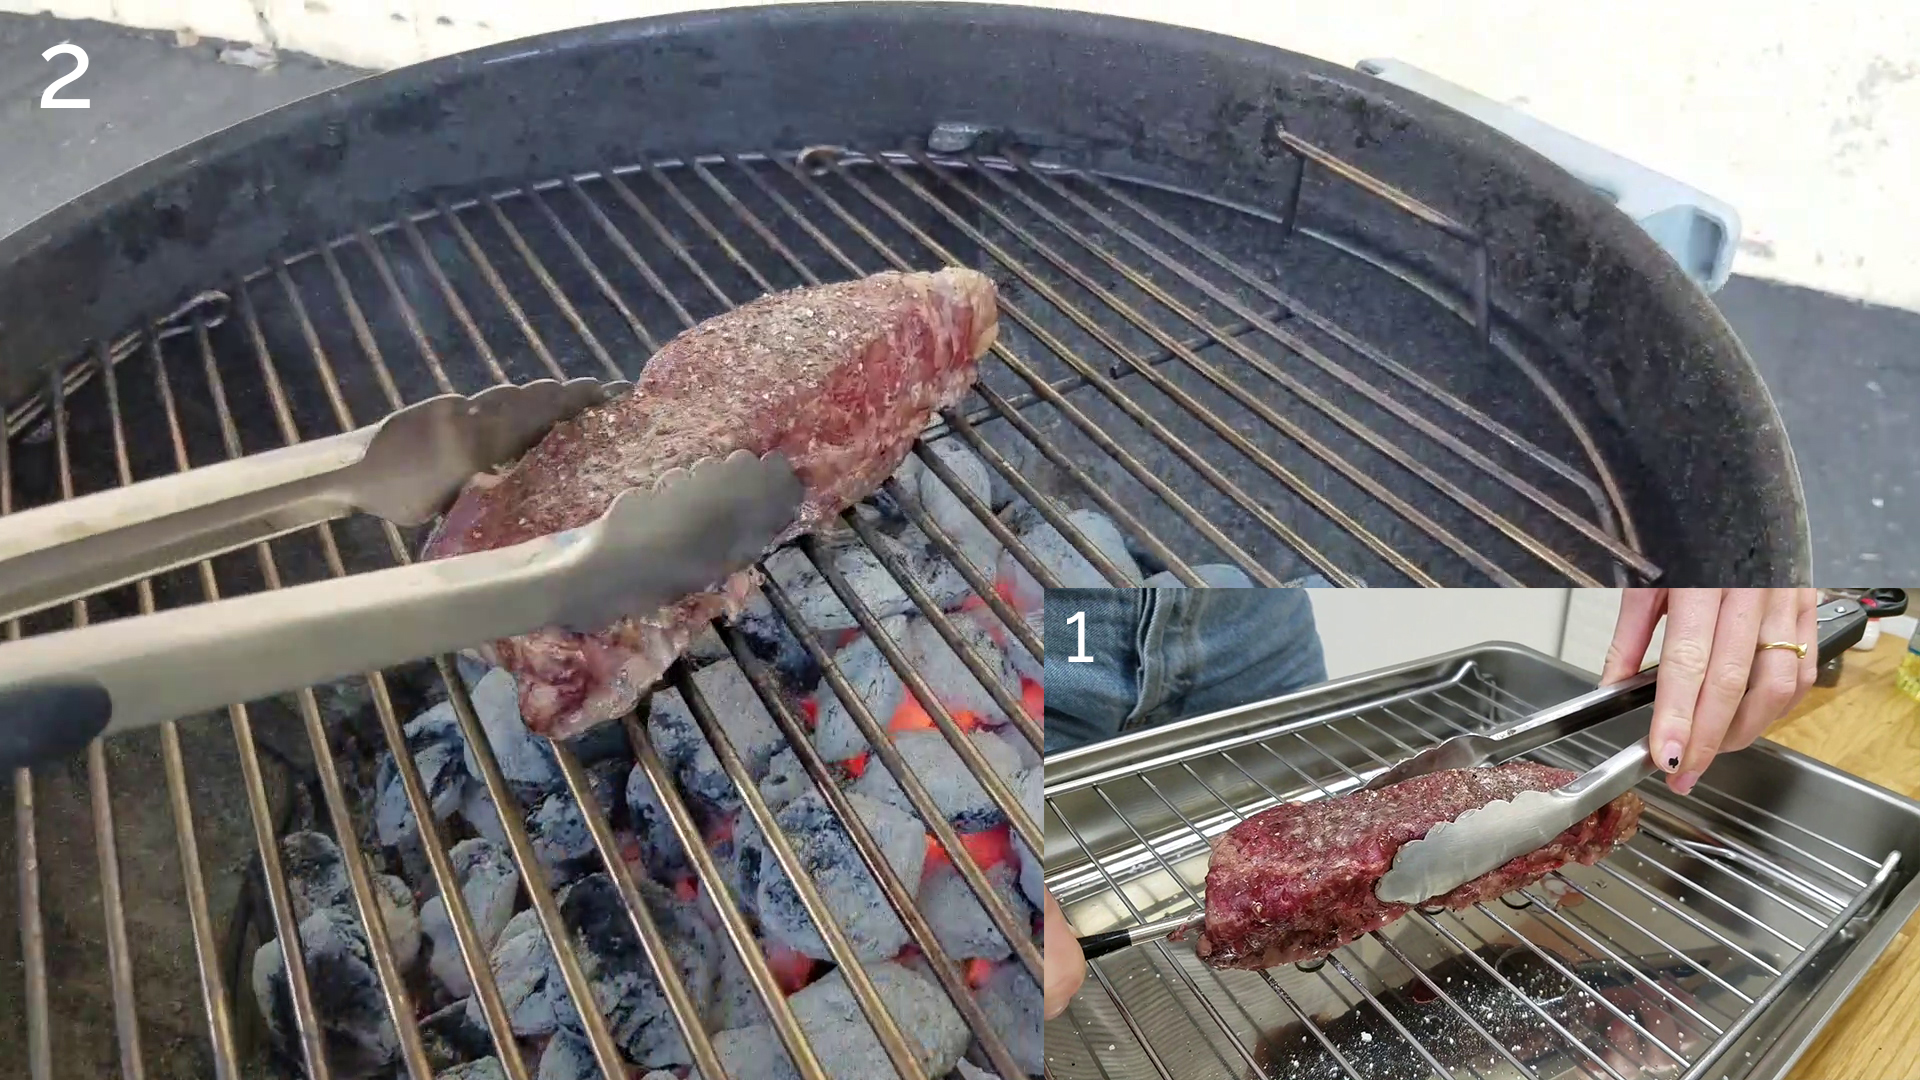
Solution: We recommend using a two-stage “reverse sear” technique:
- Cook your meat low and slow with MEATER.
- Remove the probe, then finish by searing.
Additional tips:
- The hotter your grill or pan, the better your sear will turn out. You don’t need to sear your meat for very long. At this stage, you’re searing the exterior, as the inside of the cut has already finished cooking. The less time your meat is exposed to direct heat, the better. For normal sized cuts of meat, we usually sear for about 1 minute per side.
- If you prefer to start your cooks by searing, that will also work. Just make sure you wait until after the sear is complete to insert your probe.
If you follow this advice, then MEATER will take care of the rest, and your dinners will taste the way you’ve always envisioned.
Happy grilling!