Get ready to cook the juiciest steak imaginable.
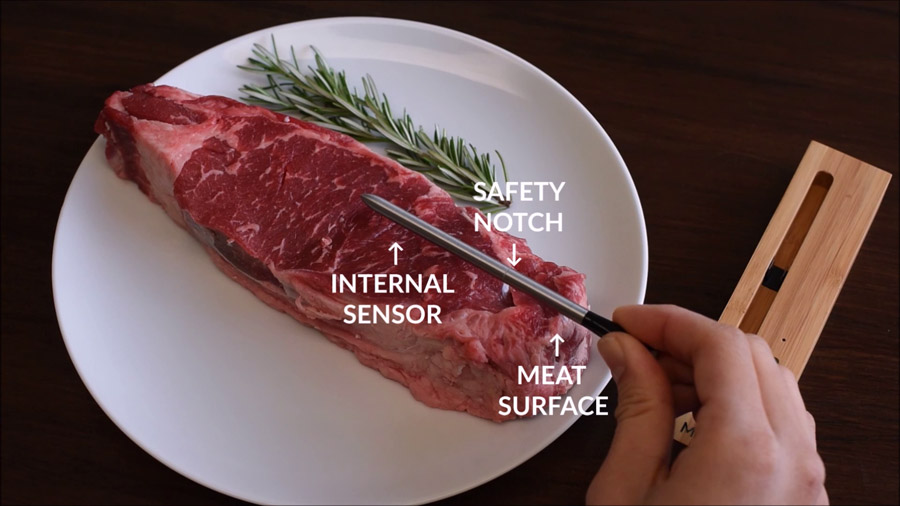
1. Properly insert the probe into the steak by making sure the internal sensor is placed in the thickest part of the meat, and the safety notch is clearly inside the steak.
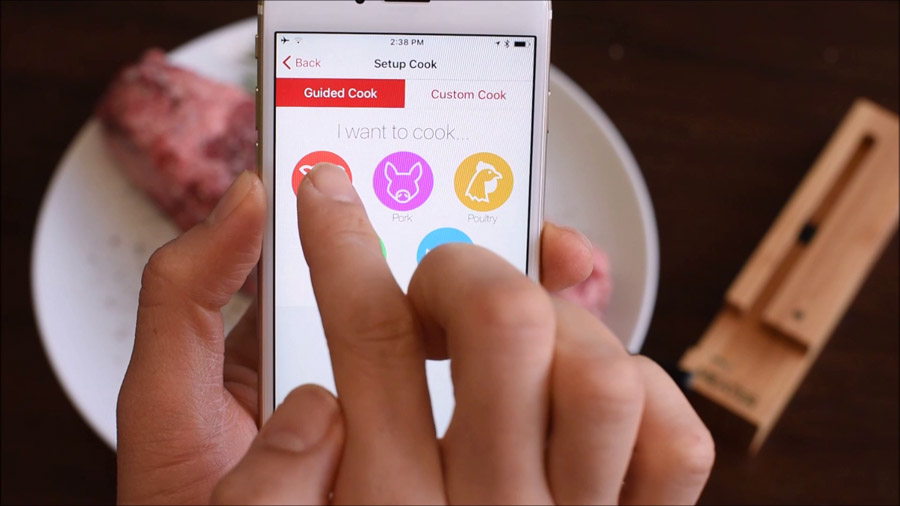
2. The guided cook feature lets you know when to remove your food from the heat, and when it’s ready to eat. This feature was designed for ameteur chefs or experts who want peace of mind. Start a new cook, and select the type and cut of meat from the choices listed under “guided cook”.
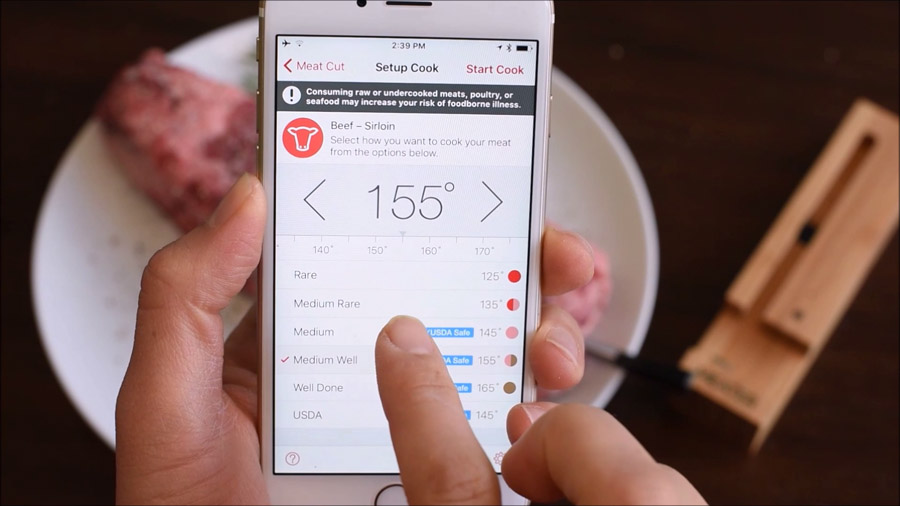
3. The MEATER app knows the proper food temperatures, so you just need to select your desired level of doneness. You can customize the temperature by moving the slider to the left or right.
4. Start by searing the steak to caramelize the surface and enhance the flavor. Once the steak is properly seared, move the steak to the oven.
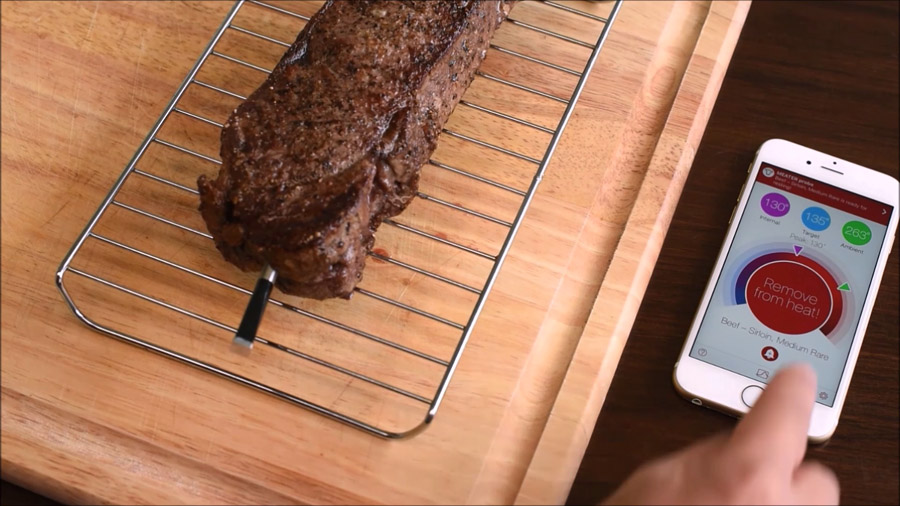
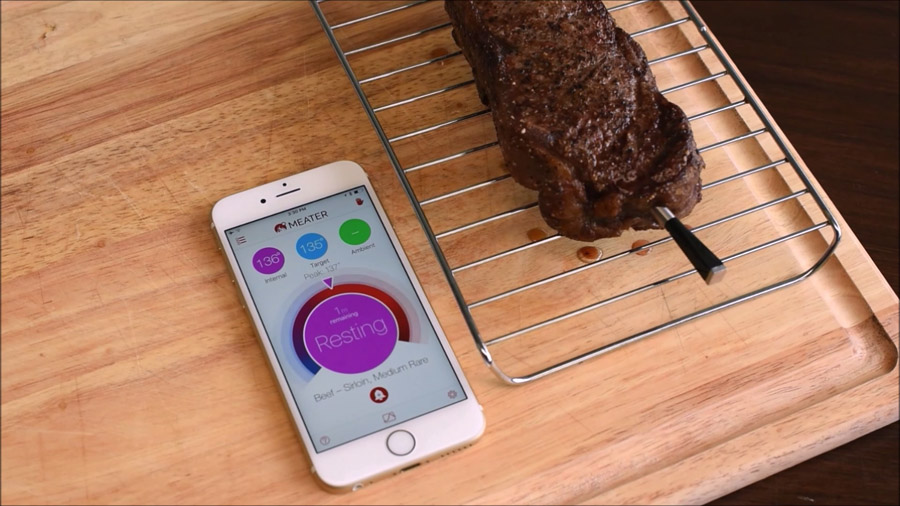
5. The app will alert you when it’s time to remove your food from the heat. Make sure to let the meat rest on a room temperature plate or tray, so as to prevent overcooking.
6. Allow the steak to rest until the app gives you the O.K. to cut into it. Resting will allow your steak to continue cooking towards your target temperature, and ensures that all the yummy steak juices will stay contained.
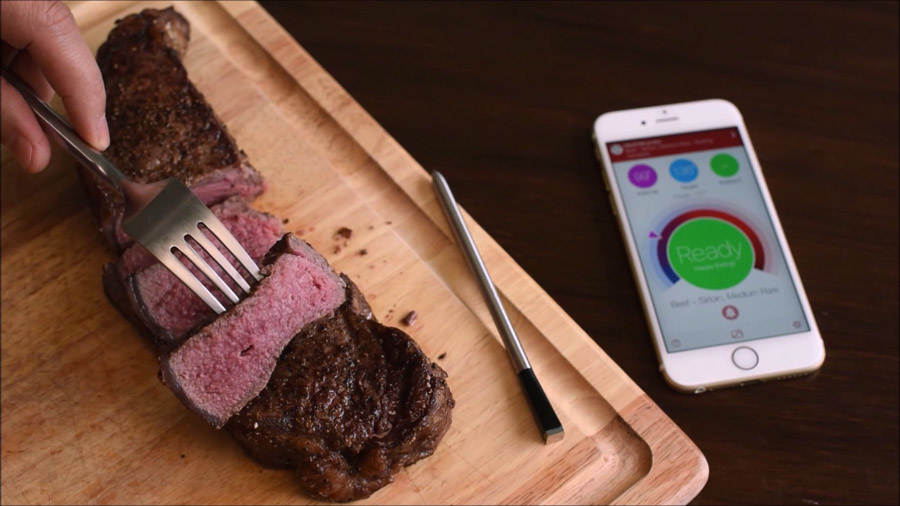
7. Once the steak is done resting, it’s ready to eat. Enjoy!
If you’ve mastered this recipe, check out our more advanced article that explains how to reverse sear a steak.