Are you craving a deliciously juicy chicken breast? MEATER’s ‘custom cook’ setting will help you prepare the tastiest cut of chicken you’ve ever tasted.
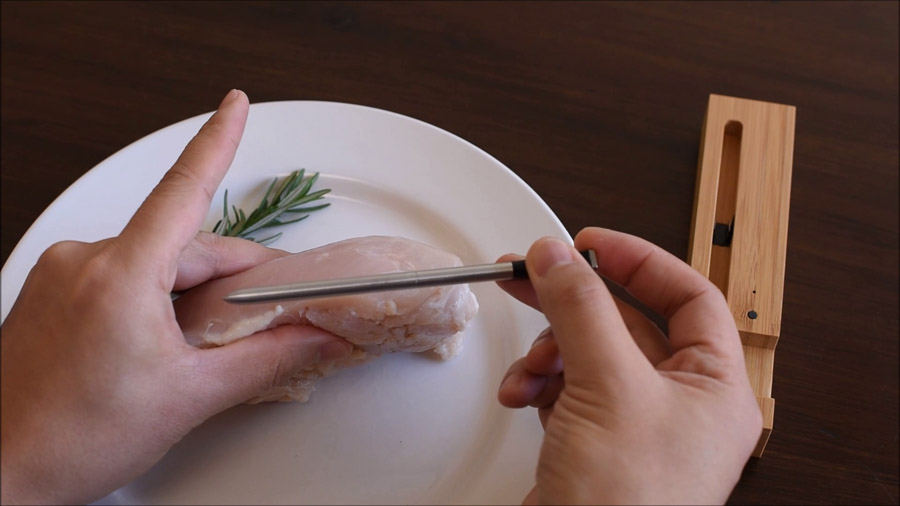
1. Properly insert the probe into the chicken breast, by making sure that the internal sensor is lodged in the thickest part of the breast, and that the safety notch is clearly inside the meat.
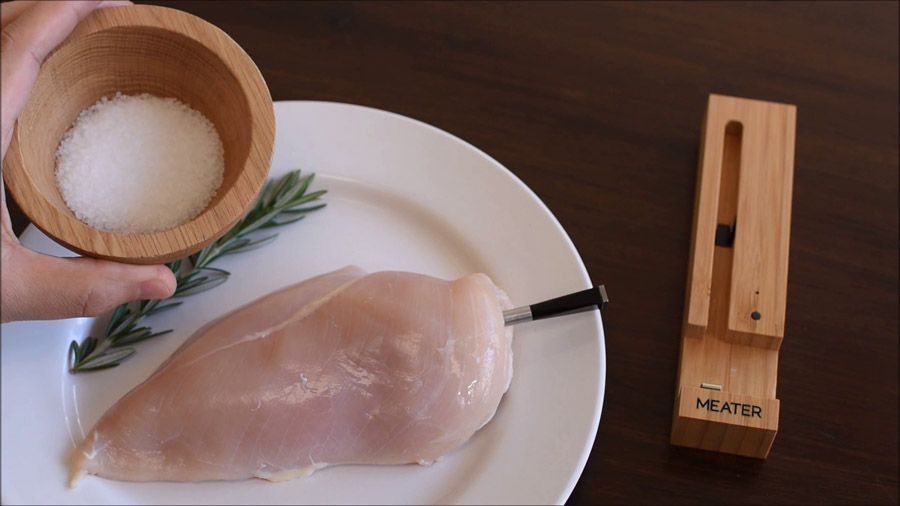
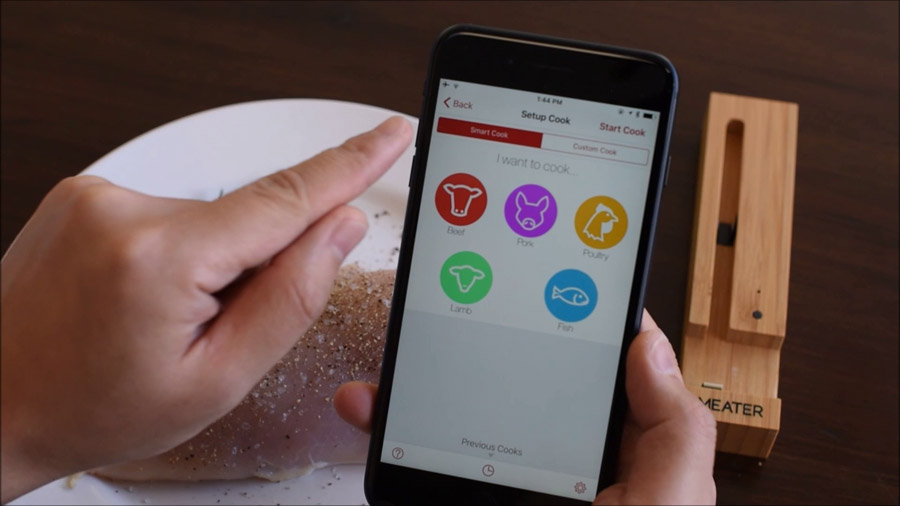
2. Once you’ve seasoned the chicken to your liking, it’s time to set up the custom cook. This feature is meant for experienced cooks, who already know meat temperatures. Launch the MEATEAR app and select the the active MEATER probe.
3. Tap on ‘custom cook’.
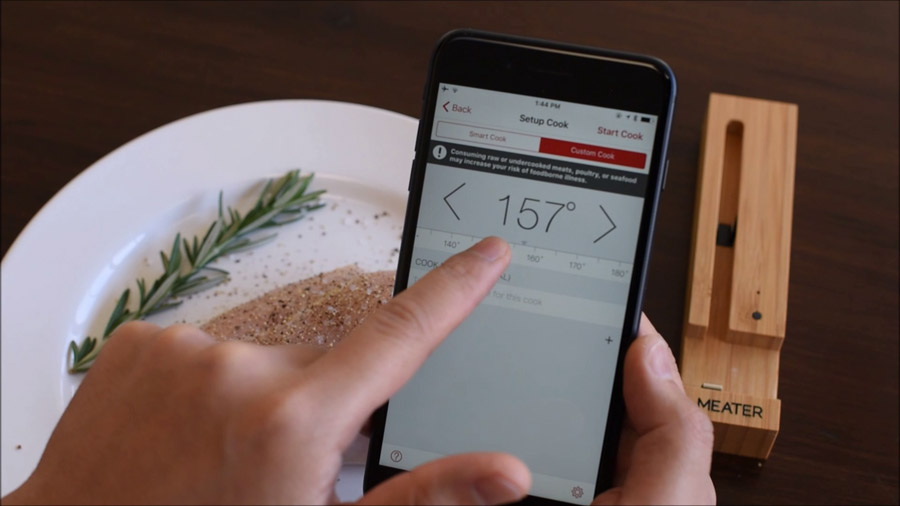
4. Select your target internal temperature by sliding left or right. For chicken, 165 degrees Fahrenheit is good. After the custom target temperature is set, name the cook something fitting.
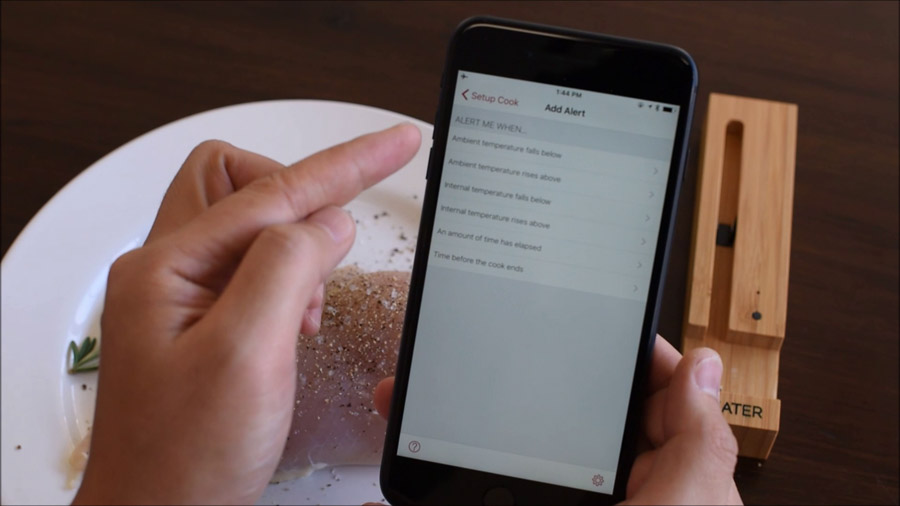
5. If you’d like, you can also set custom alerts by pressing “alerts” just below the “Cook Name” field. In this case, set an alert for when the internal temperature rises above 150 degrees Fahrenheit, as this is a good temperature to begin searing the chicken breast. Name the alert, and tap add to confirm.
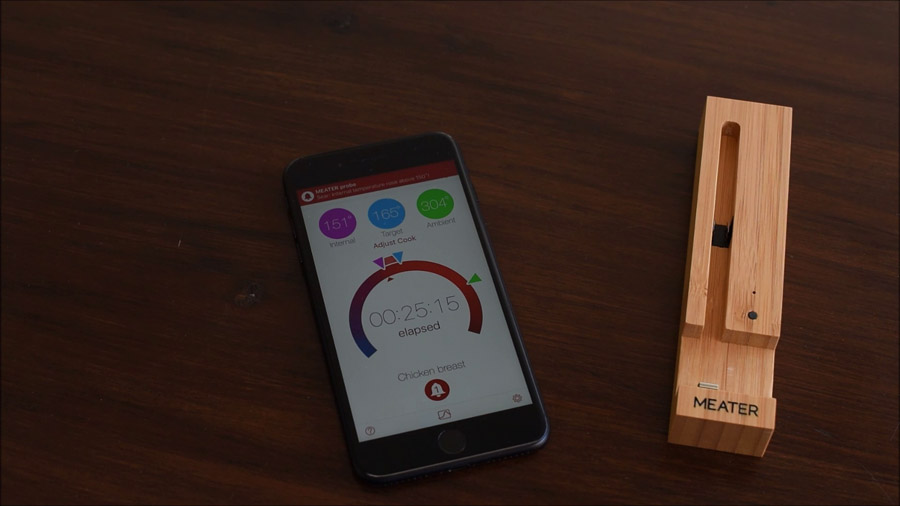
6. Press “Start Cook” and place the cut of chicken in your oven.

7. Once the internal temperature rises above 150 degrees Fahrenheit, the alert will follow. Remove your chicken from the oven, then place it in a heated frying pan to sear it.
8. Once the internal temperature reaches the target, you’ll get another alert. Remove the chicken from the pan, and enjoy (after letting it rest, of course.)
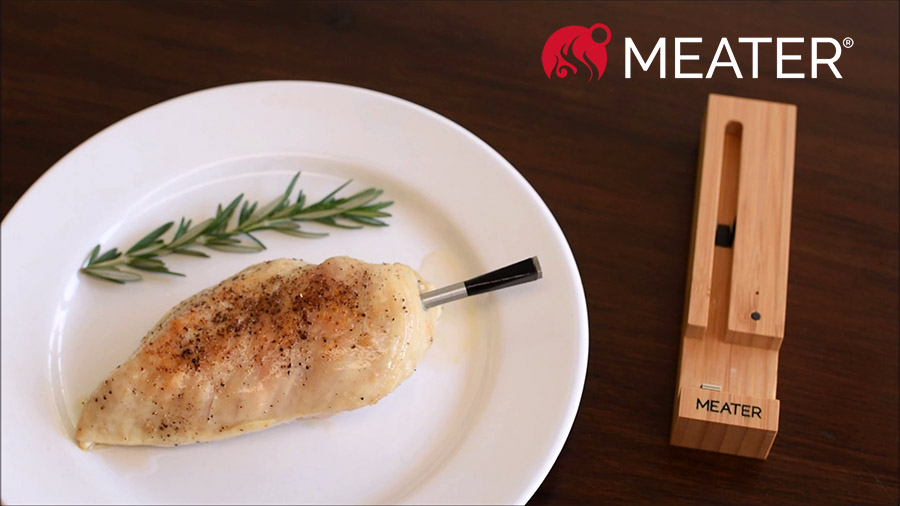
Happy cooking!